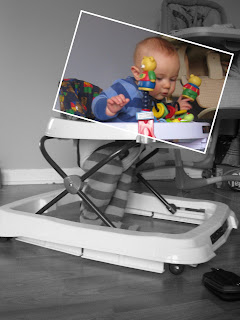
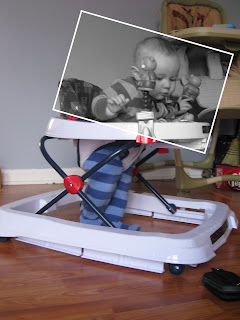
Color Snapshot / B&W Background
1. Make a rectangle selection of the area that you want to be in color using the Rectangular Marquee tool
2. Choose Select -> Transform Selection and click and drag outside the bounding box to angle the selection. Hit Enter. From the Select menu choose Inverse
3. From the Image menu choose Adjustments -> Desaturate. Then press Shift - Control - I to get back to your original selection
4. From the Edit menu choose Stroke. Enter 12 for the width and change the position to Inside
B&W Snapshot/ Color Background
1. Make a rectangle selection of the area that you want to be in color using the Rectangular Marquee tool
2. Choose Select -> Transform Selection and click and drag outside the bounding box to angle the selection.
3. From the Image menu choose Adjustments -> Desaturate.
4. From the Edit menu choose Stroke. Enter 12 for the width and change the position to Inside
Tuesday, February 26, 2008
Wednesday, February 20, 2008
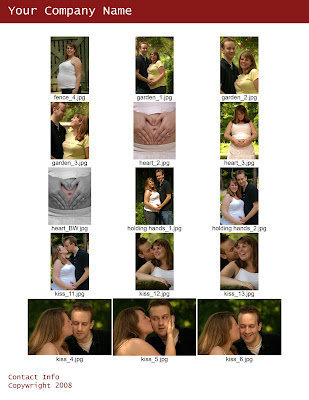
Contact Sheets
For those into photography, you'll appreciate this and for those who aren't - you could do a really great decorative piece with all of your child's photos; just print and frame!
By de-selecting the Flatten Layers option, you now have the ability to edit text, add black boxes around the images to set them off, etc...
- File -> Automate -> Contact Sheet II
- De-Select Flatten All Layers
- In the Contact Sheet II dialog box set the Width to 7 and the Height to 9
- Choose the number ofimages you want on the page by changing the Columns and Rows field (the fewer amt of pics the larger they will be)
- This will take a moment to work so sit back and relax :)
- Once this is done, it's time to add your name and contact info
- Image -> Canvas Size -> 8.5 x 11
- Create a New Layer but make sure it is UNDER the layer with your photographs
- Fill with white (Edit -> Fill -> White)
- Center your images on the page
- At the top, Type in your Name
- At the bottom Type in your contact info and make sure you put your copy wright symbol down there
- Print and mail it out to your clients!
By de-selecting the Flatten Layers option, you now have the ability to edit text, add black boxes around the images to set them off, etc...
Monday, February 18, 2008
Color Correcting and Tone
1.Flatten your first layer, then deplicate so you can easily get back to your original layer at any time. Use Control+J for duplicating.
2.Make yourself a new color balance layer with the adjustment layer icon.
3.With this new layer you can now adjust the midtones, shadows, and highlights separately. Every photo needs different editing. Beware of burning certain parts with highlights and shadows. Keep values even otherwise you'll have an odd looking effects. Always enable the preview option and click OK when it looks slightly better than before.
4. Now flatten the image. Layer>Flatten Image.
5. Again, duplicate the layer with the hot key you used before. You will now have a background layer and the new one you just created.
6. Change the new layer model from normal to hardlight in the layer menu. Adjust the layer opacity to about 65%, but the opacity for your specific photo could be from 40% to 90%. Use your judgment to determine what is best for your photo.
7. Create a new layer, except this time a Levels Adjustment layer. Modify the RGB Channel. First number is used to adjust the overall dark tones and shadows contrast. Use about 25. The second number is to adjust the midtones levels in your photo. Use 1.43. Its used to lighten your picture without dodging parts. Use 250.
8. Create another new layer, except a Hue and Saturation adjustment layer. Now you can edit the tone of each color in the Edit box. Don't put the values too high.Use the preview option. This will give you an idea of how it will look.
9. Flatten all your layers once more. Now your photo should look more enhanced.
10. Go to Image>Adjustments>Variations. Now you can tone the photograph how ever you look. For my photo I used green, blue, and cyan because of the specific landscape it is. Since mine is a lake, it was an appropriate color choice. If you have a forest, use greens and yellows. If you're using a sunset, you can use reds, yellows, and blues. Try to play with different color options to see what fits best. If you need to dark or lighten your photo when you adjust the variations, do so.
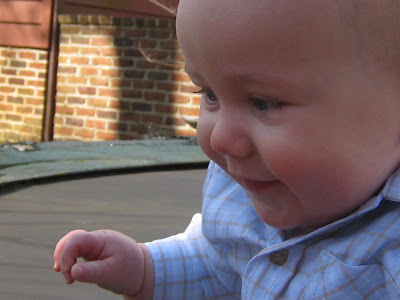
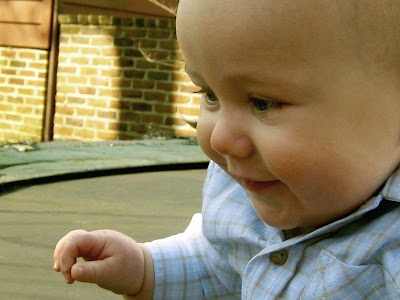
Before and After
Friday, February 15, 2008
Smoothing Skin
This is a great trick especially for those summer pictures when your skin is shiny from the heat and sun!
- Open your picture in Photoshop
- Duplicate your Background layer by right clicking and selecting "Duplicate Layer"
- Switch to the quick mask mode by clicking on the "Edit in Quick Mask Mode" button in the tool bar. It's towards the very bottom - a square with a circle in the middle.
- Select your brush tool and change it to 35 with a soft edge
- Press "D" to reset colors
- Now using your paint brush, paint the face or parts of the face you want smooth. This is going to be your selected area (if you paint a part of the picture you do not want painted hit "X" and just erase that part. Hit "X" again when done to reset your colors and begin again.)
- When you have the areas you want painted hit "Q" to exit the quick mask mode.
- You should have a selection around the face. Now go Select -> Inverse then Select -> Feather. Enter 10 px
- Filter -> Blur -> Surface Blur and try to find a number that looks good on your picture. I wouldn't go any higher than 11 though
- Then you are all finished!
Wednesday, February 13, 2008
Actions in Elements
Here is a website that explains how to run Actions in PS Elements:
Actions using Elements
Tuesday, February 12, 2008
Let's talk Actions
Actions are a wonderful way to get images to look really great without doing more than hitting a "Play" button. I grabbed this text from BMC PhotoArt to better explain what they are:
"One of the most useful features of Photoshop is the ability to store sequences of commands for repeated use, called Actions. Most commands and tool operations are recordable in actions. Adobe Photoshop actions are grouped into sets to better organize them. You use the Actions palette to record, play, edit, and delete individual actions. It also lets you save and load action files. To display the Actions palette: Choose Window > Actions, or click the Actions palette tab if the palette is visible but not active.
Also ask other Nesties if they have some Actions they would be willing to share. I know I have a few. Just page me!
"One of the most useful features of Photoshop is the ability to store sequences of commands for repeated use, called Actions. Most commands and tool operations are recordable in actions. Adobe Photoshop actions are grouped into sets to better organize them. You use the Actions palette to record, play, edit, and delete individual actions. It also lets you save and load action files. To display the Actions palette: Choose Window > Actions, or click the Actions palette tab if the palette is visible but not active.
To load a set of actions:
- Make sure you have your image already open in Photoshop
- Download the Action you want from a website and save it to your desktop. More than likely it will be a .zip file so you will have to Extract (unzip) that file.
- Once that is done locate your Actions Folder on your computers C drive. The path on a PC should look something like this:
- Once you have located the Actions folder drag the Action from your desktop INTO the folder. Close the window.
- Go back into Photoshop and choose Load Actions from the Actions palette menu. Locate and select the action set file, then click Load. (In Windows, Photoshop action set files have the extension .atn.)
- Select an action set from the bottom of the Actions palette menu. Once you have selected one hit play and let the work be done for you!
Also ask other Nesties if they have some Actions they would be willing to share. I know I have a few. Just page me!
Blurring a Background (the easy way)
- Open your Image
- Click on the locked Background Layer just so it's highlighted
- Right Click on it and select "Duplicate Layer"
- With the Background Copy Layer highlighted follow the steps to blur the background
- Using either the Magnetic Lasso Tool, Lasso Tool or Magic Wand make a selection around the image you DO NOT want to be blurred
- Once the selection is made you should have a animated dotted line. Then go: Select -> Inverse
- Filter -> Blur -> Gaussian Blur -> Using the slider determine how much Blur you actually want. I find that anywhere between 11.0 - 14.o is good.
- Hit OK
- CTRL + D to De-select your animated line selection
Creating a Black and White image with Selective Coloring
- Open your image
- Make sure your Layers palette is open (Window -> Layers)
- Click on the locked Background Layer just so it's highlighted
- Right Click on it and select "Duplicate Layer"
- With the Background Copy Layer highlighted follow the steps to turn it b&w (Image -> Adjustments -> Desaturate)
- Now with your Eraser tool just Erase the parts you want in color. If you want large parts of an image to be in color use the magnetic lasso to make the selection and then hit the Delete key on your keyboard
Turning an image Grayscale (B&W) and Sepia
Option 1
Open your image (File -> Open)
Image -> Adjustments -> Desaturate
Option 2
Image -> Adjustments -> Hue/Saturation
Slide the Saturation slider all the way to the left or simply type in -100
To get a Sepia look
Image -> Adjustments -> Hue/Saturation
Tick off the Colorize option
Hue = 36
Saturation = 19
Depending on your picture, for either options, slide the Lightness slider to your liking
Subscribe to:
Posts (Atom)